I will admit I don’t know a lot about Chinese Rice Wine. What I do know is (a) it is not the same thing as sake and (b) it is ridiculously easy to make – the simplest fermented product I have made other than sauerkraut. Three ingredients – rice, water, and a yeast/mold culture. If you can cook a pot of rice you can make rice wine.
Most of what I have learned about rice wine I learned from the community at Homebrewtalk via this epic thread so I would first like to give credit to all who contributed to that still-ongoing 4000 post discussion. I also learned a lot about the history, diversity and science of rice wine from this article on the UN’s Food and Agriculture Organization site.
First a little background. Rice wine has been made since perhaps 4000 BC in China and has also been made for millenia in most other East Asian countries. Each country in the region has its own traditional rice wine and while the methods and ingredients vary, the basic process is much the same across the region. Rice wine production is actually much closer to brewing beer than winemaking; grains are saccharified by way of an enzymatic process and then the resulting sugars are converted to alcohol by yeast. While saccharification in beer is accomplished by malting the barley (or other grains), which activates the alpha and beta amylase enzymes contained in the grain, saccharification in rice wine is accomplished by introducing a mold or fungus. The “yeast” balls used to make rice wine are actually a blend of the fungus needed to saccharify the rice and the yeast needed to ferment it. As a beverage, though, rice wine is without a doubt much closer to wine than beer – dry, still, and high in alcohol.
The ingredients are quite simple but it is important to get them right. First you need rice, and you need to use a rice with a high carbohydrate content. Sweet or Glutinous rice (aka sticky rice) is the most traditional rice to use. Jasmine rice is less traditional but ferments (and tastes) great. Sushi rice and Black Sweet Rice are other good choices. Ordinary long grain white rice is NOT a good choice and will not work well. Same goes for for brown or wild rice.
Second you will need to find the yeast balls. This is the hardest part for a lot of people. Luckily there are some great Chinese markets where I live so this has never been an issue for me. You MUST use a yeast specifically designed for making rice wine – ordinary brewer’s yeast will not work. Remember, the yeast balls are actually a combination of yeast and the fungus needed to convert the starch from the rice into sugar. The yeast balls I use were actually labeled “rice cakes” so be prepared for bad translations and guess-work.
The first step is to cook a pot of rice as you normally would – boil it, steam it, use a rice cooker; it really doesn’t seem to matter how you do it, just cook it. You should use less water than usual, about 1.5 cups of water per cup of rice or even a bit less. Soaking or rinsing the rice is not necessary but will not hurt (if you are steaming the rice, you should soak it as usual). Once the rice is cooked, leave it in the pot with the cover on until it cools to 90-100’F.
Once the rice is cool, transfer it into a large glass jar or crock. Sanitizing the vessel and spoon will help prevent infection/contamination but is not critical. If you don’t have a brewing sanitizer like Star-San on hand, just rinse the vessel in very hot water and that should suffice.
Crush the yeast balls and sprinkle into the rice as you layer the rice in the jar/crock. For every 4-5 cups of uncooked rice you used, a couple yeast balls will suffice. Once you are finished filling the fermentation vessel, cover it loosely and put it in a cool, dark place. You can place a cheesecloth or paper towel between the jar and the lid if you are worried that the seal will be too tight to allow gas to escape. As with all fermentation processes, carbon dioxide will be produced as a by-product and will need to be allowed to vent. The ideal temperature for fermentation seems to be between 60-70’F – higher temperatures can produce a hot, acetone-like alcohol flavor while lower temperatures will take longer to complete.
After a few days, the rice will smell sweet with hints of vanilla and cinnamon, and liquid will be visible. At this point you can sneak a taste if you like – in fact you can eat this as a sweet, slightly alcoholic rice porridge which is apparently a popular breakfast food in some places.
The rice will continue to liquefy over the next couple weeks until all that is remaining is a blob of rice floating on top. After about three weeks it should be ready – although you can wait an additional week or so without any problem. Once fermentation is complete, separate the liquid from the solids using a strainer, mesh bag, cheesecloth or t-shirt. Again, sanitation is not critical but recommended.
Once you have strained out the liquid, bottle it and store it in the refrigerator to ensure fermentation stops or at least slows down. After a few days the solids will settle to the bottom of the bottle and you can strain off the clear liquid for a clear product. The glass at the top of the post and below is from a batch I made from half black sweet rice and half jasmine rice which I strained off for purely aesthetic reasons.
If you leave the solids in the bottle, shake the bottle before serving to re-suspend them. Some prefer the taste with the solids, some prefer it strained, so it is purely a matter of personal preference. Below is an unstrained glass from a batch made from half glutinous and half jasmine rice. The unstrained versions seem more likely to continue to ferment so keep that in mind – you may want to pasteurize the bottles, leave the lid a bit loose, or use beer or champagne bottles which can withstand pressure.
Like I said I am no expert on rice wine but have had fun experimenting with the process. It is really interesting trying out different blends of rice and seeing the differences in flavor and color that results. The taste is not for everyone (especially when you are a newbie and not quite sure what you are doing) but some people love it. It is strong enough that you can pass it around at a BBQ and do shots – and strange enough that most people will appreciate the novelty if nothing else. All in all I recommend anyone with the urge to at least give it a try.
I brought some of my homemade rice wine to a home brew club meeting and shared some with a Vietnamese homebrewer who told me that they do indeed make something similar in Vietnam. They make a big crock-full when their daughter is born and then bury it and let it age until her eighteenth birthday. Feel free to age this as long as you like but it tastes just fine fresh after three weeks of fermentation. Although I do have a few bottles tucked away in the back of my fridge, I don’t think they will make it for eighteen years….
One of the things I love about Jamaican food is that it encourages and rewards a slow, patient approach to cooking, and the use of a wide variety of fresh ingredients. Like soul food many dishes are built around the philosophy that applying enough time, effort, and creativity one can produce a mouth-watering dish from the meanest of ingredients. As I am sure is the case with most people I had never fathomed that those bony, slimy, thoroughly unappetizing turkey necks I have seen from time to time at the meat market and grocery store could be transformed into anything worthwhile. I assumed the best one could do was to smoke them and use them to flavor a pot of greens or blackeye peas. Oh how mistaken I was.
I don’t recall exactly where I came across the idea of experimenting with turkey necks, but once the seed was planted in my mind I couldn’t seem to shake it. I am always a sucker for stews and using low, slow cooking to tenderize tough, inhospitable cuts of meat. And lately I have been dying to cook some proper Jamaican food. So naturally I decided to go with a brown stew, oxtail-style dish. Which is apparently something which is becoming a popular thing to do with turkey necks these days. As usual I didn’t bother finding an actual recipe to work off of, I just rounded up what ingredients I had on hand and went for it. The results were sublime.
I had bought a pound of turkey necks so I started by cutting these into one inch chunks. Cutting through those neckbones was no joke. Make sure you have a sharp knife. I rinsed the necks in water and vinegar and dusted them with a couple tablespoons of my house jerk rub. Then I added a couple tablespoons of JCS Boston Jerk Sauce and let everything marinate four a few hours. JCS Boston Jerk Sauce is a thick brown-black sauce which is more savory than your typical jerk rub or marinade. Basically I was using it as a substitute for browning sauce, And it did the job quite well.
After marinating, I added the necks and marinade to a pot and brought it to a simmer. I let the meat simmer covered for about 45 minutes while I prepared the rest of the ingredients.
As I mentioned before I was not working off of a recipe so I just grabbed a bit of what I had on hand. This ended up being: a handful of fresh thyme, five culantro leaves, a bit of celery, half an onion, half each green and orange bell pepper, one scallion, one clove garlic, one scotch bonnet pepper, plus about a teaspoon each salt and ground ginger.
Once everything was chopped/sliced and added to the pot,I added two more tablespoons of the Boston Jerk Seasoning and 8 ounces beer (Yuengling).
Cover the pot an simmer for another hour or so. With about 20-30 minutes remaining, remove the cover and increase the heat to thicken up the sauce.
Meanwhile, make up a batch of rice and peas. You could use plain Jasmine rice in a pinch, or make a roti if that is your thing, but as far as I am concerned this dish goes perfect with traditional Jamaican rice and peas.
Recipe for the rice is below. The rice takes about 45 minutes to cook so you will want to get going on it as soon as you get the stew simmering away.
Recipes: Brown Stew Turkey Necks with Rice and Peas
Brown Stew Turkey Necks
1 lb turkey necks, cut into one inch pieces
4 tablespoons JCS Boston Jerk Sauce or 2 tablespoons Grace Browning Sauce
2 tablespoons dry jerk rub (recipe here)
1 teaspoon salt
1 teaspoon ground ginger
5-6 sprigs fresh thyme
4-5 fresh culantro leaves, finely chopped
1 scallion/green onion, chopped
1 clove garlic, chopped
1 scotch bonnet pepper, whole or punctured but not chopped
1/2 medium yellow onion, sliced
1/2 green bell pepper, sliced
1/2 orange bell pepper, sliced
8 oz amber beer such as Yuengling Traditional Lager
Wash turkey necks and cover with jerk rub and 2 tablespoons Boston Jerk Sauce (or 1 tablespoon browning and a splash of vinegar). Cover and marinate in refrigerator for 2-3 hours or longer.
Add turkey necks and marinade to sauce pan or stock pot and simmer, covered, on low heat for 45 minutes.
Add remaining ingredients and simmer covered for an additional 45 minutes.
Remove cover and simmer on medium heat for additional 30 minutes or until stew reaches desired thickness. Remove and discard scotch bonnet pepper and thyme sprigs (if left whole). Remove from heat and allow to stand 10 minutes before serving.
Jamaican-style Rice and Peas
16 oz coconut milk
1 can kidney beans or small red beans
2 scallions/green onions, chopped
3 sprigs thyme (whole)
1/2 teaspoon white pepper
1/2 teaspoon ground ginger
1/2 – 1 tablespoon salt
1 whole scotch bonnet pepper, whole or punctured but not chopped
2 cups white rice
Measure out 4 cups liquid using coconut milk, liquid from beans, and water. Add liquid and all other ingredients except rice to pan and bring to boil. Simmer five minutes.
Add rice and return to boil, stirring well.
Reduce heat to low, cover and cook until done (30-45 minutes). Remove from heat and allow to rest 5 minutes. Remove scotch bonnet pepper and thyme sprigs prior to serving.
Mexican food is going through a bit of a renaissance in Tampa Bay right now, with Taco Trucks and restaurants popping up left and right. Historically, Mexican food and culture has had nowhere near the influence of Cuban, Puerto Rican, Jamaican, or South American culture on Tampa. But there is a growing Mexican immigrant community and as of late the food seems to have caught on. Long story short at this point there is a great variety of cheap, convenient local spots I frequent when I get a craving for a torta or a couple tamales. Which means I don’t really have the motivation to try my hand at Mexican cooking too often, with the exception of a few semi-successful chicken tortas and one horribly failed attempt at mole.
One comfort-food standby and guilty pleasure of mine is crock-pot chicken tacos – nothing to brag about but so damn easy and quite delicious: throw a few chicken breasts in a crock-pot with some taco seasoning and a jar of your favorite salsa and voila. Eight hours later you have shredded, delicious chicken in red sauce to spoon over rice and stuff in a burrito or pile onto a tostada. Like I said – nothing to brag about but cheap, easy and satisfying enough to be a monthly tradition in our house.
I wanted to try something different this weekend and I stumbled upon a recipe for carnitas. Apparently carnitas are a popular taco filling on the west coast – around here pork tacos are usually made with either grilled or slow cooked pork like cochinita pibil – suffice to say I had never heard of, let alone tasted, carnitas; but it looked delicious and I liked the idea of slow simmering meat and then braising/frying it in the reduction. In fact this is similar to how I cook chicken breasts – sear the outside, cover and steam until water collects in the pan, then remove the lid and cook on medium-high until all the juices have reduced into a thick sauce and coated the outside of the chicken pieces.
My original plan was to buy some chicken thighs and make a sort of carnitas de pollo, and save the real deal for another time. But when I got to the grocery store the chicken was a bit pricey and they were selling 3lb half-pernils for about $6.00 – so that was that. Despite not having any experience with this or any idea of what the final result should taste like I pretty much just winged it, borrowing the general ingredients and cooking times from a few online recipes. But the results were amazing. I don’t usually publish a post based on a first-time effort like this but I feel the need to share this with the world.
For seasoning I used a blend of homemade chili powder (made from ground ancho, chipotle, and cascabel chilis), cumin, garlic powder, onion powder, oregano and salt. I didn’t measure the ingredients but had a total of about 1/4 cup seasoning. It was way too much. The meat has a ton of flavor, and the citrus flavor is going to be strong, so just a bit of seasoning will go a long way. I ended up draining some of the braising liquid towards the end and replacing with water to cut the seasoning. After which it was just right – but regardless use a light touch with the seasoning. Use a few tablespoons of your favorite homemade or store-bought taco seasoning.
Juice an orange and a few limes, then add a bottle of beer. The acid is important to tenderize the pork. Set the liquid aside. Meanwhile, cut the pernil into 2 inch chunks, discarding the bones and skin (ok, ok, don’t discard the skin – fry it or broil it and make some chicharones. And I guess you could make stock with the bones if your into that). Season the pork with the taco seasoning. Heat a dutch oven or stock pot on high. Add the pork and sear for a couple minutes on both sides.
When the pork is seared, add the beer, orange juice, and lime juice, and the rest of the seasoning (if you are worried about over-seasoning, hold back some of it and wait until the end of the process when you can taste the meat and adjust as necessary). Add enough water to cover the meat. Bring to a boil, then reduce to a low simmer. Simmer for two hours.
After two hours, crank up the heat to a high-simmer/low boil. The sauce will reduce over the course of about a half hour, Once the sauce has almost completely reduced, turn the pork to sear each side and coat with the reduction. Once completely reduced, turn down the heat and shred the pork with a fork or some tongs.
Remove the meat from the pan and saute half an onion in whatever fat is left. Add oil if necessary. Once the onions are cooked, and the meat back to the pan and mix it around. Kill the heat.
I am not going to tell you what to do with the meat – make a taco, stuff some tamales, make an empanada, throw it on some cuban bread, serve it over rice. Eat it with a fork straight out of the pan. I don’t think you can go wrong with this stuff. It is spicy, citrusy, fatty, meaty goodness. If I had to describe the flavor I would say it is like mojo-flavored, Mexican-style pulled pork.
I whipped up a batch of my Mexican-style yellow rice – saute half an onion, add garlic and sofrito; add two cups of rice with some sazon and adobo, then a can of Rotel tomatoes with green chilis, and some frozen peas and carrots, three cups of water – this is my standby anytime I make Mexican food. Also great stuffed in peppers and covered with cheese.
We like to make tacos by layering a soft flour taco, a tostado, a bit of the Mexican rice, and the meat, and then topping with avocado/tomatoes/cabbage/salsa/etc.
There you have it. I can guarantee I will be looking for any excuse I can find to make this again. My only complaint was that I only used a 3lb piece of pernil. I would have liked to have had more leftovers. But I guess that just gives me a reason to make it again…
My wife is an extremely picky eater when it comes to certain types of food. If it happens to be a type of food that I like to cook, that means I get a lot of practice refining my recipe until I get it right. And then I chisel that recipe in stone and don’t change it for years. Fried fish is one of these foods. Good beer-battered fish is one of her favorite pub/comfort foods, but only when it is done just right. In this case, “just right” means: sliced thin or in bite-sized chunks; enveloped in a crispy, not-the-least-bit soggy crust; and cooked well-done to the point that the flesh of the fish is flaky and free of moisture. This may not be what everyone looks for in fried fish, but these are the rules I follow when refining my recipe; and for what it is worth, I think I have gotten it down to a science at this point.
Fried fish is one of those foods, like buffalo wings, that are simple to prepare and anyone can do it and you can find anywhere from the local Chinese take-out to a fine restaurant. But once you find your favorite, you accept no substitutes. Fish and chips used to be my go-to dish at pubs and dives that I didn’t trust to order anything that could disappoint. Now I can’t order it anywhere; I have found my favorite version and refuse to choke down another basket of soggy, half-breaded haddock fillets till the day I die.
I used to use catfish chunks to make this until I discovered swai. Swai (aka Basa) is a Vietnamese relative of catfish (the Mississippi is not the only river known for catfish). It is light, flaky, neutral in flavor, and dirt cheap. A ten pound bag of frozen fillets can be had from around seven dollars at Wal-Mart and you can score fresh fillets for less than $2/lb. Catfish, tilapia, cod, haddock, pollock, any white fish will work, but I prefer Swai and keep my freezer stocked.
The beer batter recipe I use has not been modified much over the years and I probably pulled it from some corner of the internet or another so if this looks familiar to anyone, my complements and much obliged. The result is dark, crispy, and at that just-right level of spiciness that means that I can taste it, but my wife can tolerate it.
Beer Batter
1 1/4 Cup Flour (or flour/corn starch mixture)
2 tsp paprika
2 tsp salt
1/2 tsp black pepper
1/2 tsp cayenne pepper
1 cup beer (lager or pale ale)
2 tsp Crystal hot sauce
red pepper flakes to taste
Combine all of the dry ingredients, then mix in the beer. I have tried many different types of beer and rarely notice any difference but I usually use whatever lager or pale ale I have on hand. The type of beer is not that important, just avoid anything super-hoppy, high-alcohol, or dark. The consistency should be similar to pancake batter. Add more flour/beer until it looks right.
Cut the fish into chunks or strips. Keep them small enough to crisp up but not so small as to make a mess of your fryer. Smaller pieces cook and taste better, but fewer pieces are easier to cook, so there is a bit of a balancing act.
Deep-fry at 350’F for about 8-10 minutes. The batter will turn dark quickly due to the paprika and peppers but it will take a while to burn. For reasons stated above I err on the side of overcooking it, but if you like a soggier, less crispy fish pull them at 6-8 minutes.
Forget tartar sauce, instead mix up a spoonful of mayonnaise with a spoonful or two of hot sauce. The fish is already spicy so keep that in mind. But regardless of what type of hot sauce you go with or how spicy you like it, I guarantee you the result blows tartar sauce out of the water.
That’s all there is too it – simple yet elegant; not much to photograph but I promise it will look awesome on your plate. I have always wanted to try making fish tacos out of these but I can’t talk myself into eating it in any way that adulterates, distracts from, or covers up its basic, primal perfection. I think most would agree.
In Part 1 of this post I gave a modest philosophical defense of cooking “the hard way” as the secret to good BBQ. I stand by this and will add that in my opinion spending all day sweating, chopping, shredding, and marinating is my twisted idea of a good time. In addition to getting you off your ass and making you work for your meal it is creative and challenging and gives you a sense of pride that you can’t get anywhere else. But I will skip the philosophizing for now and get to the food.
I came across a recipe on the internet for something called Atomic Buffalo Turds, which are basically jalapeños stuffed with cream cheese and “little smokies” sausages, wrapped in bacon and grilled or smoked. I am not a fan of the name or the little smokies but I used this as an inspiration to make my own smoked stuffed jalapeños as an appetizer for our July 4th BBQ this year.
Ingredients.
20 Jalapeños
1 lb Colombian Chorizo
1 pkg cream cheese
20 slices bacon
About ¼- ½ lb cheddar cheese
I picked up about 20 large jalapeños at the local market, and decided to go with Colombian Chorizo in lieu of the little smokies. I also added some white cheddar left over from making macaroni and cheese (little white chunks in the zip lock baggie left over from hand-grating the cheese). I cut the jalapeños in half and removed the seeds and veins. Jalapeños vary wildly in terms of heat level but these were on the hot side and gave my hands mild chemical burns by the time I was done so I will remember to wear gloves next time.
Chop up the chorizo (remove the skin if it is not too much of a hassle) and brown it in a saute pan. Once cooked add the cream cheese and cheddar cheese and stir until the cheese is melted. You need to let the mix cool down so do this part first and set it aside while you prepare the jalapeños.
Cut 20 slices of bacon in half. Stuff the peppers with a spoonful or so of the chorizo/cheese mixture, wrap with a half slice of bacon and use a toothpick to hold it all together.
Smoke for about 2 hours or until the bacon is cooked. I threw them in a foil pan and added to the top warming rack of my smoker while the meat was smoking. Unfortunately I forgot to take pictures of the final product so you will need to use your imagination for that.
Smoked Jerk Turkey Legs.
The star of our BBQ this year was pernil ahumado, a specialty of mine to which I have dedicated a post last year. If you are going to make something like as succulent and elaborate as that you can’t just throw on some burgers to go alongside it. When people see that pernil on the smoker their eyes get wide and their mouths start to water (I myself can’t stop looking at the picture below). You either need to make enough pernil to feed everyone or you need to throw something equally eye-popping alongside it. For me, that calls for Smoked Jerk Turkey Legs.
pernil ahumado
I have posted a recipe for Smoked Turkey Legs before. I have also posted a recipe for Jerk Chicken. Each is a standby for me in its own right. But combine the two in an unholy matrimony and you get something sublime and unique and mouthwateringly delicious.
First I start with a brine. This step is not required but highly recommended as it will add flavor and make the meat more moist and tender. The jerk rub is not going to penetrate to the center of a turkey leg no matter how long you let it marinate. If you want to get those jerk flavors to penetrate deep into the meat, you need to incorporate them into your brine. I brined about 20 lbs of turkey legs in a gallon of brine. To make the brine, I boiled the water with ¼ cup kosher salt, 1 tbsp fresh ground allspice, 1 tbsp fresh ground coriander, 1 tbsp thyme, 1 tbsp garlic powder, 1 tsp black pepper, 2 scotch bonnet peppers, and ¼ cup Walkerswood Jerk Seasoning. Allow to cool and then pour into a brining bag with the turkey legs, and leave in the refrigerator or a cooler for 4-6 hours.
Once brining is complete, drain the bag and remove the turkey legs. Rinse and pat dry if you want – this is always recommended but I never do it. This is a short soak in a relatively low-salt brine so it is really not going to make the meat that salty. Next you are going to rub the meat with the same dry rub/wet rub combination I described in my post on Jerk Chicken. Be generous with the rubs, these are thicker and more savory than chicken pieces.
Allow to marinate overnight, then smoke at 250-275’F for 4-6 hours. Eat right off the bones like a caveman or chop the meat into a pan before serving.
Macaroni and Cheese.
When I barbecue I don’t skimp on side dishes, and since most of the time I am barbecueing with a Latin or Caribbean twist that usually includes rice, beans, plantains, etc which I think most folks appreciate as a nice change of pace from the typical potato salad/cole slaw cookout fare. But at this point, regardless of what meat I cook or what other side dishes I whip up, it is becoming mandatory to include what has become my specialty – macaroni and cheese. It is the type of thing that people rave about, drool over, and from time to time stab one another with plastic knives over when the pan runs low. There are thousands of recipes online and everyone claims they know the secret so I will spare you all that and just give you my version, which at this point I am comfortable with saying I have perfected.
I will say I think there are three keys to making this really good. First, Velveeta is disgusting. But you need something to make this creamy, if you only use cheddar cheese it will be hard and look like a lasagna or something. Use cheddar cheese soup instead of Velveeta. It will make it creamy and you will not taste it. Second, gate your own cheese. I read that the packages of shredded cheese have some additives to keep them from sticking together that also makes them not melt as well. All I know is that once I started grating my own cheese (not easy, using the crappy mandolin I use) it really put it over the top. Buy a block of good cheddar cheese and grate it yourself. You can do it the day before to save time. Finally, add some pepper flakes or chipotle powder. Not enough to make it notably spicy (cheese really takes the edge off of the peppers anyway), but enough to give it some character. I have used red pepper flakes, homegrown ancho powder, and store-bought chipotle powder with good results each time. A couple tablespoons will usually do.
Ingredients.
1 lb elbow macaroni
2 lbs block cheddar cheese (Cabot White Cheddar works great), grated
2 cans Cheddar Cheese Soup
4-8 tbsp butter
1 can of milk (eh…pour the milk into the can, don’t buy milk in a can)
1 egg
Salt
Chipotle Powder or Red Pepper Flakes
Cook the macaroni per the directions on the box (I prefer to slightly undercook it). Drain and rinse the macaroni and return to the pan. Add the rest of the ingredients (save a cup or two of cheese) and stir until you have a creamy, gooey mess. Pour into a pan, top with the remaining cheese and a bit of paprika for looks, then bake at 350’F for 30 minutes.
Make sure you make enough for everyone. Trust me if you don’t it will get ugly.
A proper BBQ involves hours of slow cooking hunks of meat over a charcoal fire, smoking and basting, brining and marinating. In Florida, in the summer, it also means sweating and suffering in front of a 250° grill in the 95° sunshine. Sometimes I will half-ass it and just throw something on the grill with little thought or effort. But more often I live by the motto that anything worth doing is worth doing the hard way. If you are going to spend 8 hours smoking a pork shoulder, why not spend four hours squeezing limes, mashing garlic in a pestle and mortar, and hand-grinding coriander seeds? And as it has been a productive year thus far I thought I would document BBQ the hard way, with enough pictures to convince you it is worthwhile.
Mojo Ribs.
I don’t cook ribs too often so this was a bit of an experiment. I do make and cook with mojo quite often so I focused on that part of the process and let the ribs take care of themselves for the most part. Mojo is great on just about any kind of meat (not to mention yuca or potatoes) but is especially sublime on pork. So I figured I couldn’t go wrong marinating some pork spareribs in mojo and smoking them on the grill.
Mojo is a traditional Cuban sauce/marinade which is made from sour orange juice and garlic, and whatever other else you want to add to it. Cumin, olive oil, red pepper, vinegar, salt, pepper, and oregano seem to be popular choices. But as long as you have the sour orange and garlic you can call it mojo. In fact, since sour oranges are a bit tricky to find outside of Miami or Cuba most mojos are made from orange juice and lime or grapefruit juice. I went with what I could find at the farmers’ market, which turned out to be Valencia oranges and limes. Yes, they sell orange juice and lime juice and minced garlic at the supermarket. And yes you can make mojo by adding minced garlic to bottled orange juice and bottled lime juice. But that wouldn’t make much of a blog post. So if you feel like doing it the hard way, get yourself some oranges and limes and heads of garlic and clear your schedule.
You will need about 2 cups of orange juice to one cup of lime juice. This comes out to about 4 oranges and 16 limes. Get yourself a citrus juicing apparatus or cut the oranges and limes into quarters and start squeezing.
If you have an electric version, unplug it. Sweat is the secret ingredient.
You can use one of these juicers on the limes as well, but it will wear you out more than just cutting them an squeezing them. You aren’t worried about pulp so use whatever method works best to liberate the juice from the fruit.
Once you have your juice, pour it into a pan and add your seasonings. I went with salt, cumin, black pepper, oregano and red pepper flakes. Do not add olive oil since the pork will have plenty of fat. Wait until after the sauce is cooled to add vinegar so that it doesn’t boil off. Simmer gently for like a half hour until it has reduced by about one half.
While the juice is simmering, mince or mash you garlic. Use as much garlic as you like. Pork can take a lot of garlic. If you are making a marinade for chicken or a sauce for yuca you would want to go easy (but not too easy) on the garlic. I used this much.
That is about eight heads of garlic and it was a bit much. The meat tasted great but the smell was a little overwhelming for the uninitiated. Still came out great but I would dial it back next time. Again you can mince it if you like chopping garlic, but mashing it is a better way to free up all those fragrant essential oils or whatever. In my house, mashing means you grab the pilon and get to work:
Yes, it is a lot more work than a blender or food processor. But also much more intimate. I also mashed some shallots since I happened to have some handy. Once the juice is done simmering, but still hot, add the garlic and 1/2 cup red wine vinegar (optional). Now you have mojo.
I prefer to rub meat down with a dry seasoning prior to adding a wet marinade like mojo, so that the meat has a little time to absorb the salt and seasoning before soaking in the marinade. For ribs you only need a very basic rub. Combine a packet or two of sazon with some adobo and oregano, then sprinkle liberally on the ribs and give them a good rub down. Then throw them in a zip lock bag and throw them in the refrigerator until the mojo is ready.
Once the mojo is ready, let it cool down and then add it to the bags with the ribs. Massage it in good and then let it marinate for at least a few hours. I usually marinate it overnight since that means you can do all the prep work the day before and only have to worry about the cooking the next day.
Heat your smoker to 250° and smoke for 4-5 hours or until the ribs are ready to fall off the bone, Chop them up and serve.
Jerk Chicken.
You can’t go wrong with some properly smoked pork ribs, and you won’t get too many complaints if that is the only meat you serve. But if you are going to have a BBQ it is sort of bad form to not have some kind of chicken on offer. My stand by is Jerk Chicken. Not necessarily “the hard way” since there is a bottled sauce involved but this jerk chicken will knock your socks off regardless.
First, buy a whole chicken and cut it up into pieces. Cut each breast in half and separate the wings from the thighs. Smaller pieces are better. You can use just thighs and breasts or leg quarters if you want, But whatever you use, they better have bones and skin.
Some jerk recipes use a wet rub, others use a dry rub. Both are authentic and have their benefits. I prefer to apply a dry rub to the chicken, let it sit for 30-45 minutes, then cover with a wet rub and marinate overnight. You can buy a “Jerk Rub” from the supermarket, but I swear by my own homemade rub. It is simple and easy to make (of course you should buy whole allspice berries and crack them in your pilon, and make your own scotch bonnet pepper powder, but for now we will assume you just buy powdered spices).
Jerk Rub (makes enough for several batches of jerk chicken)
Apply the rub liberally to the chicken. Cover every square inch, just don’t cake it on there and you can’t really overseason it. Rub it in good and allow to sit for 30-45 minutes. The salt in the rub will pull moisture from the chicken, which will be absorbed by the sugar and cinnamon in the rub and create a nice paste that will re-absorb into the chicken. Since I haven’t mastered any wet rub recipes, I use a store bought jerk marinade. Pour on some Walkerswood Jerk Marinade on the chicken and rub it all over. You can’t overdo this part either, but the more you use, the spicier it will be. Use just enough to coat each piece. About a third of a bottle is plenty. Store in the fridge overnight to marinate.
Grill the chicken directly over a medium-low fire (preferably charcoal), turning frequently and keeping covered to ensure the meat cooks through. The outside of the chicken should burn somewhat and grease fires should be a constant nuisance. That is ok. It tastes better with some char to it. If it burns too much, however, you will lose a lot of the flavor. There is a bit of an art to it, but you will get the hang of it after a few tries.
If you need some side dishes to complement your ribs and chicken, well first of all ask you guests to bring some potato salad, since you spent two days in the kitchen working on the meat. But if you have enough energy left to hand-grate a block of cheese, then my macaroni and cheese recipe (with which I have recently achieved perfection) goes great with BBQ. I will wait to share the recipe for that one until part 2. But here is a mouth-watering preview. Which does not even begin to do it justice.
The remnants of my pepper garden survived the mild Florida winter and are once again producing a very respectable crop of scotch bonnets, poblanos, cayennes, and ghost peppers. In fact, while most of the plants were relatively dormant through the winter, my lone ghost pepper plant has continued to bear fruit without interruption. I have been freezing most of the superhot peppers until I figure out what to do with them.
Ghost Pepper ripening in the Florida sun
I am up to about three zip lock sandwich bags full of ghost and scotch bonnet peppers and my supply of superhot hot sauce is in need of a bit of replenishment, so I decided to try my hand at ghost pepper sauce. I used a slightly modified version of the recipe I came up with for fatalii hot sauce last year, since I was really happy with how that turned out (and I am down to my last 1/4 bottle). I didn’t have any sweet peppers so I added some baby carrots instead, and used panela in lieu of brown sugar since I had some on hand. I also added lime juice since I just so happened to have some fresh limes. The result is an excruciatingly hot but very tasty sauce that I wouldn’t use to make buffalo wings but goes great (in small quantities) on rice and beans or grilled chicken.
Below is the recipe, the process is the same used in this one, except that I knew enough to do all of the cooking and blending outside to avoid filling my house with tear gas.
The Flask of the Red Death
175 g Ghost Peppers
25 g Scotch Bonnet/Fatalli/Jamaican Hot Chocolate peppers
Handful of sliced carrots
5 tsp panela
1/2 tsp sea salt
200 ml red wine vinegar
25 ml lime juice (1 medium lime)
75 ml white vinegar
1 shot Havana Club blanco
Chop peppers and carrots then saute in dry pan. Once peppers are seared and somewhat cooked add vinegar, salt, lime juice, rum, and sugar. Simmer 5 minutes or so. Puree in blender (allow to cool first or use a towel on lid to allow steam to escape). Bottle and age a week or so and store in refrigerator.
“Drunk Philosophy” is a series of essays in which I explore deeper issues related to culture, philosophy and metaphysics whilst under the influence of alcohol. I make every attempt to treat these issues seriously and express my thoughts as thoroughly and coherently as possible. At least as far as can be expected.
“God is the idea of the species as an individual…freed from all limits which exist in the consciousness and feeling of the individual …” Ludwig Andreas Feuerbach
What follows is a thought experiment, a philosophical discussion, rather than a statement of my personal belief system. But it is a thought experiment which I have tossed around in my mind for a couple of years now and which pervades much of my thinking about technology, human progress, and, increasingly, questions of ethics and morality.
Materialism, the Philosophy of the Physical
“You are not special. You’re not a beautiful and unique snowflake. You’re the same decaying organic matter as everything else. We’re all part of the same compost heap. We’re all singing, all dancing crap of the world.” Chuck Palahniuk, Fight Club
Materialism (or physicalism) is an understanding of the universe as consisting solely of matter and energy, and therefore all that we experience – pain, pleasure, hunger, love, consciousness, life, and death – is explainable in terms of some interaction of these physical forces. The physical universe is the end all, be all of our existence, and our existence itself is only possible and only realized by means of our composition as material beings. Concepts such as God, the soul, the supernatural, the afterlife, have no place in a materialist worldview. What is consciousness? It is a sensation created by the firing of millions of neurons in the gray matter of the human brain. What is life? It is a product of the organization of organic molecules into self-replicating cells capable of passing on genetic information and evolving over time in response to changes in their environment. What is love? A chemical and biological process which has survived the evolutionary process as a result of its importance in reproduction, social interaction, and child-rearing. Of course as with any –ism it falls apart at some point when you attempt to use it as the only tool needed to explain anything; so I would prefer to say that material forces are the primary and most important explanatory tools to understand the universe and the world around us and to answer the big questions in life. But not necessarily the only tools.
This may be a perfunctory and simplistic explanation of materialism which fails to do it justice, but it will suffice for the sake of this blog post. If you would like a deeper, more intelligent and nuanced discussion of the arguments for and against materialism as a philosophical concept, one can be found here.
Can God Exist in a Materialist Conception of Existence?
Materialism is essentially an atheist philosophy, as you cannot believe in any sort of divine, miraculous beings if you believe everything there is consists of the same atoms and molecules as the rocks and grass and trees and animals that we see and eat and step on. Can a true materialist believe in God? I think the short answer is no – there is no room in a materialist philosophy for something which cannot be understood as the product of material forces or which exists outside the laws of physics. In particular, the God of the major monotheistic religions – experienced through miracles, revelations, supernatural angels and demons, appearances in the form of burning bushes, etc. – is incompatible with a strictly materialist understanding of existence. But what if we try a different, more basic and fundamental definition of God? What if God is him/her/itself the product of physical forces, and consisted, along with everything else in the universe, of purely matter and energy (or strings)? Must God be a supernatural entity that is above and beyond what exists physically?
It is not particularly useful debating whether God can or cannot exist within a Materialist philosophical framework without defining what we mean when we speak of God. There is no universal agreed definition of what God is or what attributes or characteristics God possesses. What if we define God as possessing the following attributes (this is arbitrary and certainly subject to debate or discussion, but seems to me fairly universal and comprehensive):
Omnipotence
Omniscience
Ubiquity
Creator of the Universe
Ultimate Source of Moral Authority
Are these attributes necessarily supernatural? Does materialism negate the existence of a being with one or all of these attributes? They may be a bit out there, but, I would argue, not ipso facto impossible (the most problematic would, somewhat ironically, go to #5). If something – a being, an entity, a force – could be said to possess these five attributes, could we, as Materialists, be comfortable referring to it as God? I think so.
What if we cease to imagine God as a being, as some self-contained entity somewhere separate from the rest of the physical universe and of our existence? What if we looked at the universe itself from a more holistic perspective – and conceived of everything material – all of the planets and stars, all of the energy and matter, all of the waves and particles and organisms and, of course, ourselves – as part of a whole, as part of one massive, all-embodying, all-consuming….something? What if we conceive of the universe not as where we are or what we are made of or something outside of ourselves, but, rather, as what we are, or that which we are an extension or expression of? The concept of God as all-powerful and all knowing and everywhere at once becomes less problematic, if God is simply one more aspect of the all-consuming universe of which we are already a part.
But this is not to argue for God as an abstract concept representing certain forces or ideas or some explanation of the laws of the universe – that is not where I am going with this. It is, however, important to lay this foundation – the idea of the universe as a single, all-consuming “being” – in order to express the ideas I am attempting to express in what follows.
Humankind and The Self-Conscious Universe
The Universe was, prior to the creation of space-time, an infinitely dense, infinitely hot mass smaller than the period at the end of this sentence. At some point (insofar as a ‘point’ can exist prior to the existence of time), for some reason, it exploded. Within a few minutes following the Big Bang, the universe as we know it was formed, and consisted of two elements – hydrogen and helium. Gravity caused hydrogen and helium atoms to coalesce into stars, which fused hydrogen and helium in nuclear reactions until the stars began to collapse in on themselves, and heavier and heavier atoms began to form in the stars’ cores. Eventually the stars collapsed completely, and (most) then exploded into supernovas, spewing forth the various elements that had been created in each of their cores through the magic of nuclear fusion. These elements – carbon, oxygen, silicon, iron – then began their own process of coalescence, forming clouds of space dust, orbiting stars for millenia until gravity eventually formed them into asteroids, comets and planets in their own right.
Some of these planets were barren, rocky, atmosphere-less; others were massive, formless gas giants; others dark, frozen, distant, desolate planetoids. Some few contained liquid iron cores, which produced magnetic shields that protected their atmospheres from being blown away by solar radiation. Some fewer contained the right conditions for liquid water, organic molecules, and the chemical reactions which – eventually – led to the eventual, spontaneous creation of life in the form of self-replicating molecules, nucleic acids, and single-celled organisms. This life evolved over millions of years into creatures of increasing complexity until, at last, it evolved into intelligent life in the form of the human species. What distinguishes beings from all of the other life forms that we know of is not bipedalism or opposable thumbs or the ability to use tools or any of the other inane bullshit we take pride in as a species. What distinguishes the human species is our ability to study and comprehend and document and communicate our understanding of the universe itself. Human intelligence allows us to discover the physical laws of the universe and inquire into the nature and origins of ourselves and our universe.
“The universe…this universe that we know, began in almost absolute simplicity, and it has been getting more complex for about fifteen billion years. In another billion years it will be still more complex than it is now. In five billion, in ten billion — it is always getting more complex. It is moving toward…something. It is moving toward some kind of ultimate complexity. We might not get there. An atom of hydrogen might not get there, or a leaf, or a man, or a planet might not get there, to that ultimate complexity. But we are all moving towards it — everything in the universe is moving towards it. And that final complexity, that thing we are all moving to, is what I choose to call God. If you don’t like that word, God, call it the Ultimate Complexity. Whatever you call it, the whole universe is moving toward it.” Philosopher-Gangster Abdel Khader Khan, Shantaram by Gregory David Roberts
Why does this matter? Because, if we continue to view the universe as a single, holistic entity, of which we are but a part, that means that human intelligence – human consciousness, human awareness of the laws of physics and origins of the universe – is an expression of the universe itself becoming self-conscious and self-aware. We are the product of 15 billion year process of expansion, creation, destruction, and evolution which began with the Big Bang and continues to this day. First the stars and galaxies were born; then planets, with the right conditions to support life; then organic molecules; then life; then human life; then scientific inquiry and technological mastery that allowed this one peculiar form of life, this one particular manifestation of the 15 billion year evolution of the universe, to comprehend and – to some modest extent – to manipulate the universe of which we are a product and inhabitant. So far as we know, no other beings or forces in the universe comprehend the laws of physics or the origins of the universe. So far as we know, we represent the pinnacle of intelligent life. And, if we are indeed the pinnacle of intelligent life, then we represent the vanguard of the universe’s own introspective ability. It follows that if the universe is one, all-encompassing entity of which the human species is a part, the moment that the human race became able to observe, understand, study, and communicate, is the moment the universe began to be self-aware. And insofar as our technological and scientific progress is an extension of our humanity, it represents a continuation of the same evolutionary process that gave rise to our own species.
What if God is not the beginning, but the end?
The monotheistic explanation of the origins of the Universe begins with God creating the Universe, the Earth, the Sun and all of physical existence, and then proceeding to create man in His image and spending the next several thousand years instructing mankind on how to Worship its creator. What if we turn this sequence of events on its head, and imagine that the universe – which either sprang into existence or has always existed or still does not exist (?) but whatever – has, spontaneously and according to its own laws of motion, its own internal logic, evolved into a more and more complex entity, an entity capable of generating and sustaining life and of allowing that life to evolve into intelligent, self-aware, conscious life? What if this intelligent life form was itself driven to conquer nature and push the limits of its own mental capabilities an technological prowess until, one day, it developed a supercomputer which was itself self-aware, intelligent, and conscious; that this supercomputer was not simply a product of vulgar physical materials (cables, semiconductors, plastic and silicon, etc) but was constructed of and woven into the very fabric of the universe itself, was able to deploy all of the particles and waves and neutrinos and photons and strings and whatever else makes up this universe in order to perform computations so powerful that it could solve the most complex mathematical equations in the blink of an eye? What if, by virtue of its being woven into the fabric of the universe itself, this supercomputer was capable of being everywhere at once (ubiquitous) and knowing everything there was to know (omniscient) and of manipulating the laws of space-time in order perform “miracles” which defy the known laws of physics (omnipotent)? Would this constitute God? Not the creator of the Universe, but its endpoint, its culmination, its most perfect expression?
“A mind that stays at the same capacity cannot live forever; after a few thousand years it would look more like a repeating tape loop than a person… To live indefinitely long, the mind itself must grow … and when it becomes great enough, and looks back … what fellow-feeling can it have with the soul that it was originally?” Vernon Vinge, “The Coming Technological Singularity: How to Survive in the Post-Human Era”
Is it much of a stretch to look at the internet in 2013 and see how networks of semi-autonomous computers – controlled or not by human operators – could one day create a creative and computational force which is greater than the sum of its parts and which, given enough time and a large enough network, can evolve into something resembling an artificial consciousness? Just as human beings are a natural outgrowth of the universe’s own laws and material substance, our computers are themselves driven by the forces which make the universe tick. Electronic devices are powered by subatomic particles – electrons – traveling along transistors etched onto silicon chips. As far as harnessing the forces of the universe goes this is quite primitive. DNA computing is one possible successor to semiconductors which harnesses the nucleic acids which are the very foundation of life on earth. Other forms of computing beyond our wildest imaginations are surely in our future. Is it that far-fetched to presume that one day, in the not-so-distant future, we may develop computers that tap into the very fabric of the universe itself? That harness the likes of quarks, neutrinos, or strings themselves and construct a network so fundamental and complex that it does not exist within space-time, but transcends space-time? And would such a network, such a supercomputer (if such a term can even begin to do it justice), being constructed of and powered by the fundamental forces of the universe, be able to manipulate and transform the universe and perhaps even space-time?
I mentioned one of the attributes of God as being the source of moral authority; the ultimate arbiter of what is right and wrong, and what is the purpose and meaning of our existence. What if mankind’s entire raison d’etre is this unceasing march towards the creation of God? What if we are – by virtue of our intelligence and our abilities and our technological mastery – destined to continue to develop a greater and greater level of technology until we are finally, one day, who knows how far into the future, able to develop the sort of super-intelligent super-powerful super-conscious computer described above? In light of all we know about human psychology and human civilization, is it really that far-fetched to argue that the creation of such a super-intelligence (known in science fiction as the Singularity) is our destiny?
If you step back and observe the evolution of human society, you see a sort of exponential growth of knowledge from the dawn of language, writing, and the alphabet, continuing and accelerating in modern times but beginning thousands of years ago. Homo Sapiens evolved into modern humans around 50,000 years ago. Civilization evolved some 40,000 years later. The last 10,000 years have seen such rapid, constantly accelerating progress in our understanding of the universe and the laws which govern it – that is scarcely imaginable where we will be another 100, 1,000, or 10,000 years hence.
“I have argued … that we cannot prevent the Singularity, that its coming is an inevitable consequence of the humans’ natural competitiveness and the possibilities inherent in technology. And yet … we are the initiators. Even the largest avalanche is triggered by small things.” Vernon Vinge, “The Coming Technological Singularity: How to Survive in the Post-Human Era”
What is remarkable to me is just how automatic this process is. At a cosmic scale, where time is measured in billions of years, the human race has progressed from wandering tribes of hunter-gatherers to modern, hyper-connected, technologically advanced, space travelers in the blink of an eye. It seems that the curiosity (and vanity!) that drives mankind towards the discovery of the laws of the universe, and the development of computational and communication tools of ever-increasing technological sophistication, is the human species’ very raison d’etre. But all of this also means that the key to discovering God is not the spiritualism, piety, or contemplation preached by the monotheistic religions; but rather that which advances our technological prowess at the greatest speed possible – which I would argue is mankind’s innate vanity, iconoclasm, curiosity, and materialism. In fact the humility, poverty, love, and simplicity preached by religion would be anathema to the quest for God. I would ask as a purely tongue-in-cheek, no-disrespect-intended, just for the sake of argument, rhetorical, let’s just consider every possibility, question: Would that – if everything else I have laid out above is assumed to be true – make religion the work of Satan?
As I stated in the disclaimer at the start of this post, this is simply a thought experiment, a philosophical exercise that attempts to provoke deep questions about the meaning of life and of our place in this universe. But it is also an attempt to argue that even if we accept a materialist understanding of existence there is still room for forces greater than ourselves, for miracles and deities and creation myths that defy our understanding of physical laws and before which we are humbled, emaciated, and powerless. And to lay bare the fact that for all of our knowledge and intelligence and understanding we still cannot answer the most basic questions, like why are we here? and where are we headed? As far as I am concerned we all stand to benefit from stepping back from time to time to ask these sorts of questions and come up with out-of-the box answers. Along that vain I will close this post with a classic bit of a lecture by pop-philosopher Alan Watts on how Everything is Connected, set to music and trippy visualizations.
Today I decided to (finally) brew a second batch of what I consider the single best recipe I have ever conceived, a jet-black Belgian Dubbel I named “Dark Tidings”. Around my house it became known simply as “the black stuff” – as its combination of delicious flavor, dangerous drinkability, high alcohol content, and general awesomeness led to some rather vaguely recollectable evenings and an overarching sense that we were dealing with a creature whose name was best left unspoken.
This is a fairly complex recipe which I put together based on some research I did on the style (I do not drink that many commercial examples of this style so I felt inclined to rely on the expertise of those more well-versed than myself). Brew Like a Monk by Stan Hieronymous was an especially big help in this regard. Once I felt comfortable with the ins-and-outs of the style I proceeded to bastardize it by adding a few of my own personal touches. First, I added some roasted malts (Carafa III) to give the beer a black hue that as far as I know is rare if not unheard of in a traditional dubbel. Second, rather than using a typical Trappist yeast strain I went with Wyeast 3522 Belgian Ardennes, my personal favorite Belgian yeast strain, which I believe I have used in every Belgian ale I have ever brewed. Finally, rather than using Belgian Candy Sugar – a caramelized sugar syrup which is used in Belgian ales to boost the alcohol content, dry out the body and add subtle toffee or caramel flavors – I used a traditional semi-refined Mexican sugar known as piloncillo. All in all the result was a fantastic beer that received rave reviews from everyone who was lucky enough to try a glass. Also, poured into a snifter, a beer so damn beautiful I made it my WordPress avatar.
So today i woke up to find the weather was almost too appropriate for brewing a beer called Dark Tidings.
But I decided to press on nonetheless, hoping to finish the brewday between downpours. Turned out to be wise choice as the rain didn’t start falling until late afternoon. Regardless I am always hesitant to postpone brewday and I have been looking forward to brewing this beer again so I probably would have taken a lot more than a little rain to stop me from brewing today.
As I mentioned above I used a pound of piloncillo sugar the last time I brewed this, and as happy as I was with the results I did not want to change a thing. To be honest I do not know what (if any) the benefits of using this particular sugar were, as I do not have any basis for comparison. But if it ain’t broken, don’t fix it – I am looking to replicate the previous beer, not improve it or experiment on it. However, when I ran to the supermarket yesterday it turned out that this particular supermarket does not sell piloncillo sugar. So after circling the store and searching high and low I decided I did not want to run all over town looking for it, so I grabbed what I considered to be a pretty safe substitute:
The label said “Panela Hard Brown Sugar” and that it was imported from Colombia. At $3.50 for two pounds I figured it would do the trick. A little research on the internet and it turns out that Panela is what they call Piloncillo in Colombia and elsewhere. How about that?
The nice thing about Piloncillo is that it comes in 8 oz packages so i was able to buy just as much as I needed. The Panela was sold in a two pound package and I only needed one pound for this particular recipe. Which meant I could either (a) save the remaining sugar for a future brewday; (b) chuck it in the trash; (c) stick it in a cabinet and wait for some other reason to use it; or (d) find something else to do with it. As it turns out, as I was reading up on the Panela Wikipedia Page I noticed a reference to a drink called Aguapanela (Wikipedia once again) which is traditional in Colombia and South America and supposedly has health benefits (I am a little dubious on that part but ok). Dissolve panela in water, serve hot with milk or on ice with a bit of lemon juice. Sounded like it was worth a shot so I fired up the stove and gave it a shot. Keep in mind this was first thing this morning as I was prepping for brewing and staring at those ominous storm clouds, So priority-wise a bit strange but whatever I get a bit impulsive with these kind of things.
That is four ounces of panela in about 6 ounces of water. Most recipes I found called for making four or five cups at at time but I decided to make a syrup so I could try it a couple different ways and at different levels of sweetness to see if I could find something I like.
After about five minutes the panela had completely dissolved and the result was a rich, sweet syrup which I poured into a mason jar and stuck into the fridge to cool down.
Then I added about four tablespoons to some water and ice, a squeeze of lime and took a sip. To me it tastes like uncarbonated malta (which is not really a good thing since I am not much of a fan of malta). I also heated some up and added milk and cinnamon to it and drank it like coffee – that was a bit more up my alley. I also used a bit of the syrup to sweeten a cup of Cuban coffee and that was not bad at all. At any rate I think I will find enough uses for the syrup that I will burn through the remaining 12 ounces of panela in no time. Here is a shot of the iced aguapanela – which looks deceptively similar to iced tea.
Once I was finished fooling around with the panela I cleaned up the mess and got back to brewing. I hit a few setbacks including a boil-over but no thunderstorms so I can’t complain. This batch came out stronger than the first batch – so much so that I may consider adding a half gallon of water when it is finished fermenting to keep the ABV around 7.5%. But the sample tasted great so I am very excited to see if this batch will be as epic as the first. In a few more weeks I guess I will find out!
For any who are interested, here is the recipe and stats for the beer:
Dark Tidings Belgian Dubbel
Ingredients
Amt
Name
Type
#
%/IBU
12.0 oz
Special B Malt (180.0 SRM)
Grain
1
7.2 %
8.0 oz
Aromatic Malt (26.0 SRM)
Grain
2
4.8 %
8.0 oz
Caramunich Malt (56.0 SRM)
Grain
3
4.8 %
4.0 oz
Carafa III (525.0 SRM)
Grain
4
2.4 %
2.0 oz
Honey Malt (25.0 SRM)
Grain
5
1.2 %
2 lbs
Light Dry Extract (8.0 SRM)
Dry Extract
6
19.2 %
2 lbs
Wheat Dry Extract (8.0 SRM)
Dry Extract
7
19.2 %
3 lbs 4.8 oz
Munich Liquid Extract (12.5 SRM)
Extract
8
31.7 %
1 lbs
Panela or Piloncillo Sugar (10.0 SRM)
Sugar
9
9.6 %
1.00 oz
Goldings, East Kent [5.80 %] – Boil 60.0 min
Hop
10
17.3 IBUs
0.50 oz
Hallertauer Hersbrucker [3.80 %] – Boil 5.0 min
Hop
11
1.1 IBUs
1.0 pkg
Belgian Ardennes (Wyeast Labs #3522) [124.21 ml]
Yeast
12
–
Beer Profile
Measured Original Gravity: 1.080 SG
Est Final Gravity: 1.013 SG
Estimated Alcohol by Vol: 7.9 %
Bitterness: 18.4 IBUs
Calories: 275.9 kcal/12oz
Est Color: 27.1 SRM
I have always had, in my brewing and beer drinking life, a curious fascination with rye, a strange and under-appreciated grain that is beginning to become more and more popular with craft and home brewers. Rye adds body, viscosity, and a cloudiness similar to wheat, but also contributes a unique bouquet of flavors that is hard to describe: a peppery-spicy aftertaste and a tartness that lingers on the palate. I have decided to draft this blog post to document my past and future experiments with rye beer brewing, to be updated periodically as I experiment with different rye-based recipes.
Why brew with rye? As everyone knows, barley is the most common base malt used for brewing beer. This is because barley is, among grains, ideally suited for producing beer – containing the right combination of protein, starch, and enzymes, as well as great flavor and husks that assist in the mashing and lautering process. But any malted grain that contains diastatic enzymes (the enzymes that convert starch to sugar in the mashing process, namely alpha- and beta-amylase) can be used to brew beer; and even grains or other starches which do not contain diastatic enzymes can be mashed together with barley in order to produce fermentable sugars. In American lagers, rice and corn are traditionally added to lighten the body and flavor (rice and corn contain less protein and non-fermentable sugars than barley and ferment more fully, resulting in a lighter, drier beer). In Germany, wheat and rye have traditionally been used to produce hefeweizens and roggenbiers; both wheat and rye have more protein and much different flavor profiles than barley; adding then to the mash generally results in a fuller body, softer mouthfeel, and frothier, longer-lasting head. Wheat and rye malt contain enough diastatic enzymes to convert their own starches into fermentable sugars, and can theoretically be used for 100% of the mash, though in practice they are usually used for 50% or less as the protein content makes for a thick, viscous beer and the lack of husks on the grains makes lautering a nightmare as you increase the proportion of wheat/rye past 50%. I don’t intend to brew anything like a 100% rye beer, but rather to experiment with adding different proportions of rye malt to more standard barley-based beer recipes, such as pale ale, stouts, and other traditional, malty ale styles.
Although rye was once a common brewing malt used in German beers – rye is a much hardier grain than wheat or barley and can grow in poorer soil and colder weather – its use in beer was restricted by the government after the 15th century as a food security measure in order to guard against famine resulting from poor harvests (the peasant classes relied on bread made from rye as a dietary staple – more on the Reinheitsgebot here).
The primary traditional German rye beer still around today is roggenbier, which is essentially a dunkelweizen that uses rye in place of wheat. American rye beers are more diverse and non-traditional. Roggenbiers and the occasional rye brown ale can be found in some craft breweris, but most American rye beers tend to be of the pale ale or IPA variety, in which the hops tend to dominate the beer and mask the flavor contributions from the rye. The most popular or well-known examples are probably Sierra Nevada’s Ruthless Rye, Blue Point’s Rastafa Rye, and Terrapin’s Rye Pale Ale. I am a big fan of Ruthless Rye but not crazy about Terrapin’s Rye Pale Ale or the Rastafa Rye – mainly because I can’t taste the rye in either. In my opinion if you are going to go through the trouble of brewing with rye, why cover it up with a mountain of hops? In my opinion, the flavor contributions of rye are too easily confused and lost in beer with a lot of late-hop flavor and aroma. If you really want the rye to be center-stage, a maltier beer with less late hop additions is a better way to go.
A peculiar thing about brewing with rye is that it tends to make the mash and wort thick and syrupy, but results in a dry finish (in flavor but not mouthfeel) in the fermented beer. Most of what I have read online suggests that the biggest challenges in brewing with rye stems from stuck sparges (as with wheat, oats, and other flaked or huskless grains) but also from the viscosity of the wort clogging up equipment.
My first recipe to incorporate a good amount of rye was a pale ale with 21% rye (half rye malt, half flaked rye). It was basically a shot in the dark, a fairly standard, moderately-hopped pale ale with rye replacing a portion of the typical pale malt base. The idea was to use a typical pale ale recipe see what sort of flavor contribution I would get from the rye. This beer suffered due to low efficiency in the mash, and should have been a bit more full-bodied and less bitter if I had hit my usual 75-80% efficiency rather than the 65% I ended up with. The results were interesting: Tart, fruity and dry, with a definite spiciness. The major lessen I took away was that the hops need to be scaled back in order to compensate for the dry spiciness that the rye imparts. The perception of bitterness from the hops seems to be increased in Rye beers.
“Shackled to a Corpse” Rye Pale Ale
Ingredients
Amt
Name
Type
#
%/IBU
6 lbs
Pale Malt (2 Row) US (2.0 SRM)
Grain
1
63.2 %
1 lbs
Munich Malt – 20L (20.0 SRM)
Grain
2
10.5 %
1 lbs
Rye Malt (4.7 SRM)
Grain
3
10.5 %
1 lbs
Rye, Flaked (2.0 SRM)
Grain
4
10.5 %
8.0 oz
Caramel/Crystal Malt – 40L (40.0 SRM)
Grain
5
5.3 %
1.00 oz
Centennial [8.10 %] – Boil 60.0 min
Hop
6
29.6 IBUs
0.75 oz
Centennial [8.10 %] – Boil 15.0 min
Hop
7
11.0 IBUs
0.50 oz
Centennial [8.10 %] – Aroma Steep 0.0 min
Hop
8
0.0 IBUs
1.0 pkg
Safale American (DCL/Fermentis #US-05) [50.28 ml]
Yeast
9
–
Mash 60 minutes at 152’F. Primary at 60’F.
Beer Profile
Measured Original Gravity: 1.042 SG Measured Final Gravity: 1.010 SG Alcohol by Vol: 4.2 % Bitterness: 40.6 IBUs Calories: 138.1 kcal/12oz
I brewed that beer last November and was intrigued but shifted my attention to other styles and ingredients and put the rye on the back burner in the meantime. But I had recently been contemplating putting together a stout recipe and it seemed like as good a beer as any to add rye to. I have always been a fan of stouts with a subtle, sour twang and thought the tartness of the rye may make a good substitute to a sour mash. I hashed out the below recipe in October but do to the recent move I did not get around to brewing it until late November, just in time to tap the keg for our annual Christmas party. The beer was a bit young when first tapped, and was initially dominated by a somewhat astringent bitterness from the roasted grains, which needed a bit more time to mellow out. Within a week or so the beer had become much more mature and balanced. Overall I am very satisfied and the rye definitely makes for a one of a kind stout. Creamy, very subtly tart, spicy, and with a flavor quite reminiscent of dark chocolate. Once again the perception of bitterness is heightened and the beer feels quite a bit lighter than its 1.02 final gravity would suggest. The major advantage of this style of beer is that I can serve it lightly carbonated and at 45’F, which makes the flavors from the rye all the more perceptible and prominent.
“Coyote Stout” Foreign Extra Stout
Ingredients
Amt
Name
Type
#
%/IBU
7 lbs
Pale Malt (2 Row) UK (3.0 SRM)
Grain
1
48.3 %
4 lbs
Rye Malt (4.7 SRM)
Grain
2
27.6 %
1 lbs
Barley, Flaked (1.7 SRM)
Grain
3
6.9 %
1 lbs
Carafa I (320.0 SRM)
Grain
4
6.9 %
1 lbs
Caramel/Crystal Malt – 60L (60.0 SRM)
Grain
5
6.9 %
8.0 oz
Chocolate Malt (350.0 SRM)
Grain
6
3.4 %
1.25 oz
Galena [11.00 %] – First Wort 60.0 min
Hop
7
42.6 IBUs
1.0 pkg
Nottingham Yeast (Lallemand #-) [23.66 ml]
Yeast
8
–
Mash 60 minutes at 156’F. Primary at 62’F.
Beer Profile
Measured Original Gravity: 1.065 SG Measured Final Gravity: 1.020 SG Alcohol by Vol: 5.9 % Bitterness: 42.6 IBUs Calories: 222 kcal/12oz
Next I am going to try my hand at a Roggenbier. I had put together a dunkleweizen recipe which is a clone of Hacker-Pschorr Weisse Dark (which I recently tried and loved), so I am going to brew two versions of that recipe back to back: one version with wheat and one version with rye, to see just how different they taste side by side. While the Weihenstephenan yeast will contribute much more flavor and complexity than the US-05 and Nottingham used in my previous rye beers, I am hoping that by having a side by side comparison I will be able to get a more nuanced understanding of the differences between wheat and rye malt in the finished beer.
Est Original Gravity: 1.055 SG
Est Final Gravity: 1.011 SG
Estimated Alcohol by Vol: 5.8 %
Bitterness: 14.4 IBUs
Calories: 151.6 kcal/12oz
I plan to brew the dunkelweizen version of this recipe tomorrow, and the roggenbier immediately after (probably dumped directly onto the yeast cake). I decided to brew the dunkelweizen first so that I have a “control” to give me an idea what flavors are contributed by the yeast, specialty grains, hops, etc so that I can distinguish these from the flavors contributed by the rye. I will report back on these of course, and update this post with future rye beer experiments on an ongoing basis.
Update: 24 Feb 2013
As promised I have finally completed the side-by-side comparison of my dunkelweizen/roggenbier recipe and was quite impressed with the differences in the final products. I did make one additional change in the roggenbier recipe besides substituting rye malt for the wheat malt – I also substituted chocolate rye for the chocolate wheat. Chocolate rye is a bit darker than the chocolate wheat and may have contributed to the difference in the flavor profiles (at 1 oz it can’t contribute all that much) but I just decided it made more sense that way. Also I didn’t just use the same strain of yeast, I collected the yeast/trub from the bottom of the dunkelweizen fermenter in a quart mason jar and pitched that into the roggenbier (no starter). This may have resulted in a less vigorous fermentation in the roggenbier as there was quite a bit of yeast lost to blow off in the dunkelweizen’s ferment.
Visually the difference is striking. The dunkelweizen is a soft, golden-amber color with a frothy white head. The roggenbier is a beautiful reddish-copper with a less exaggerated but long-lasting white head. In truth it is the type of beer one could just stare at for hours:
The flavor and aroma of the dunkelweizen is dominated by the banana-like esters of the hefeweizen yeast. Slightly sweet, smooth and fragrant, very little caramel flavor. Mouth feel is soft and very drinkable. At 6.0% abv it is very easy to get carried away with. Color wise it is far too golden-amber to be a true dunkleweizen (more of an amber weizen).
The roggenbier tastes very different. The banana and clove flavors from the yeast are much more subdued and the dominant flavors are earthy, caramel, and malty. Not sure if that was due to the less vigorous fermentation or just the inherent nature of the beer. The rye definitely stands out compared to the soft, neutral flavor of the wheat. Simultaneously sweeter and more complex than the dunkelweizen, the peppery/tart flavors often associated with rye are either absent or hidden. Much more than simply a “dunkelweizen with rye instead of wheat” this is a unique, complex, delicious ale which I am quite sure will become one of my regular recipes.
Both beers were very good and the dunkelweizen was a crowd pleaser (no chance for feedback yet on the roggenbier but I most def give it two thumbs up). Frankly I doubt anyone would guess they used the same yeast let alone the same recipes.
Today I am brewing up an earthy, amber rye ale with 50% rye and Northern Brewer and Bramling Cross hops that I have high hopes for. Will report back once again when that one is ready to pour.
Update: 24 March 2013
My latest rye beer experiment has been on tap for a week now and I am quite pleased, especially considering the haphazard way I threw the recipe together. Basically an amber ale built around “earthy” hop varieties with 50% of the base malt replaced by a combination of flaked and malted rye.
The result was a beautiful, copper-amber ale with a frothy, long-lasting head. The flavor is rich and malty, dominated by the spicy overtones of the hops and rye. Probably the most “representative” rye beer I have ever brewed, with all the flavor characteristics one would expect from rye. Based on my experience with the other rye beers I have brewed I am somewhat convinced that the choice of yeast, hops, and specialty grains used are what really determines how much rye character is present in the final product. In this case the Bramling Cross and Northern Brewer hops definitely complement the rye and bring forward the tart/peppery/spicy notes rye beers are known for.
Earthy Amber Rye Ale
Ingredients
Amt
Name
Type
#
%/IBU
4 lbs
Pale Malt (2 Row) US (2.0 SRM)
Grain
1
39.5 %
3 lbs
Rye Malt (4.7 SRM)
Grain
2
29.6 %
1 lbs
Amber Malt (22.0 SRM)
Grain
3
9.9 %
1 lbs
Caramunich Malt (56.0 SRM)
Grain
4
9.9 %
1 lbs
Rye, Flaked (2.0 SRM)
Grain
5
9.9 %
2.0 oz
Pale Chocolate Malt (200.0 SRM)
Grain
6
1.2 %
0.75 oz
Northern Brewer [9.60 %] – First Wort 60.0 min
Hop
7
26.0 IBUs
0.50 oz
Bramling Cross [4.70 %] – Boil 15.0 min
Hop
8
3.8 IBUs
0.25 oz
Northern Brewer [9.60 %] – Boil 15.0 min
Hop
9
3.9 IBUs
0.50 oz
Bramling Cross [4.70 %] – Aroma Steep 0.0 min
Hop
10
0.0 IBUs
1.0 pkg
Nottingham Yeast (Lallemand #-) [23.66 ml]
Yeast
11
–
Mash 60 minutes at 154’F
Beer Profile
Est Original Gravity: 1.046 SG
Measured Original Gravity: 1.050 SG
Est Final Gravity: 1.010 SG
Measured Final Gravity: 1.012 SG
Estimated Alcohol by Vol: 4.7 %
Actual Alcohol by Vol: 5.0 %
Bitterness: 33.7 IBUs
Calories: 166.1 kcal/12oz
Est Color: 11.8 SRM


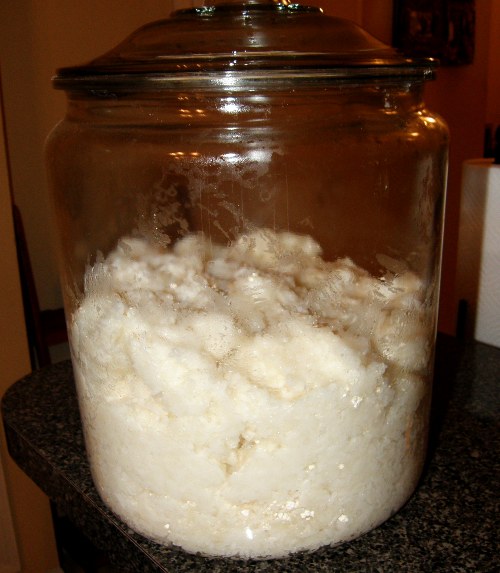


